There are many ways to migrate Word Press from a server to another. I’ll go through the easiest way to migrate Word Press from a server to a PC.
The one possible reason to have a copy of Word Press in local machine is that it can be useful when testing new version or new plugins. When changing content, normally we don’t need to test it in PC before, we just can update in server. As Word Press provide version control of content, we can go back to a previous one if we need to.
Let’s migrate.
If you haven’t used Word Press in PC, the easiest way to host Word Press in windows PC is installing it using Bitnami installation package, which includes PHP and MySQL that are necessary to run Word Press in windows machine. There are various ways to do this, but Bitnami package seems the easiest solution.
Part 1. Install Word Press in PC
If you already installed Word Press in PC, you can skip part 1.
Download the installer from https://bitnami.com/stack/wordpress/installer. You may need to register as a free member, if you are not yet.
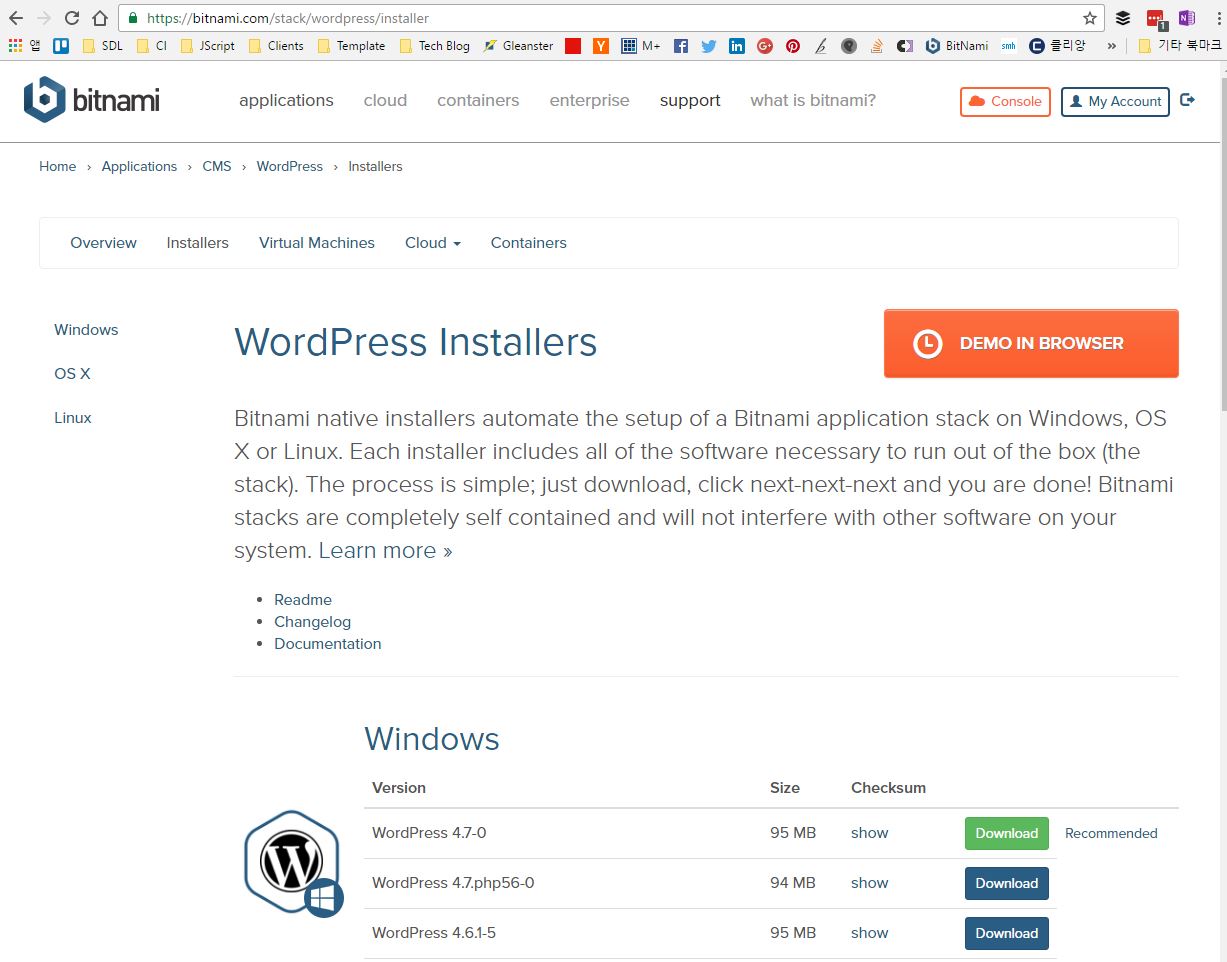
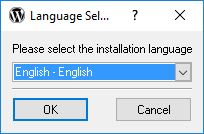
Run the downloaded installer.
![]()
Installation is straightforward. In most cases, just select default option.
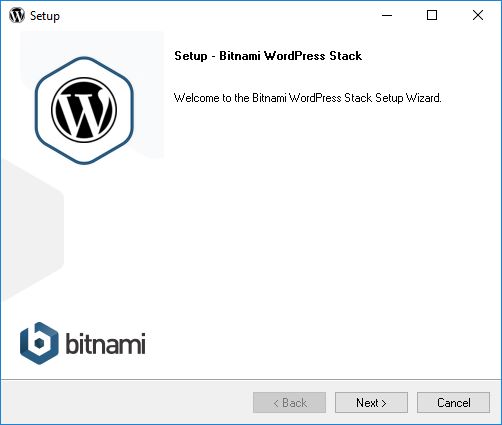
You can change installation folder if you want.
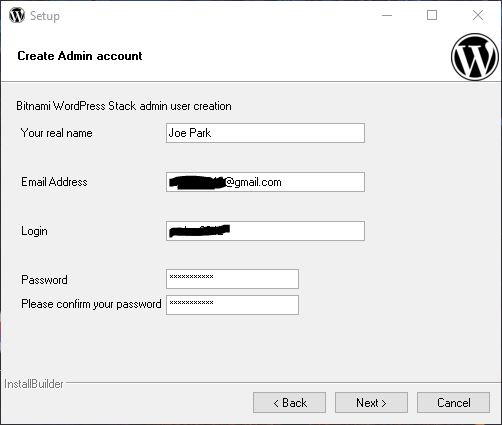
Choose Login and Password wisely as this will be used to login Word Press and the same password will be set for MySQL’s ‘root’ credential too.
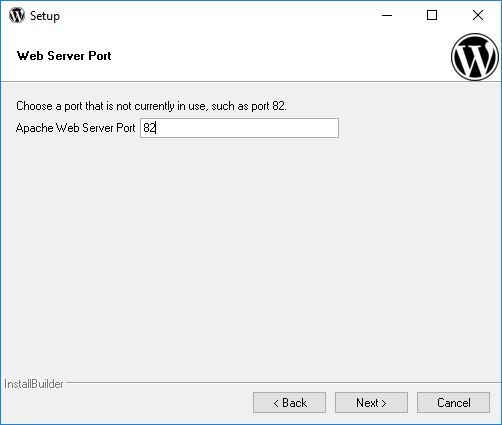
This is nice one. Installer will show you a default port that’s available. As I’m currently using 80 and 81, the installer suggested 82.
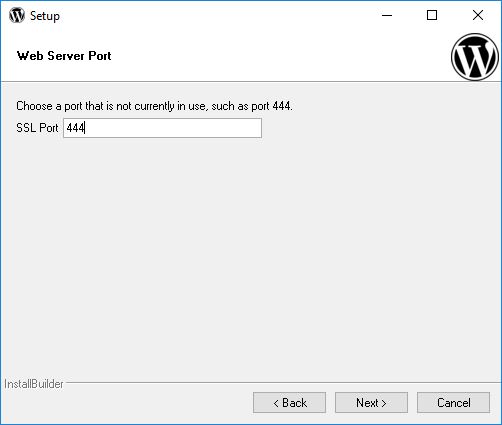
As I already using 443 for SSL, the installer suggested 444 for the SSL port of newly installing Word Press. You can choose as suggested.
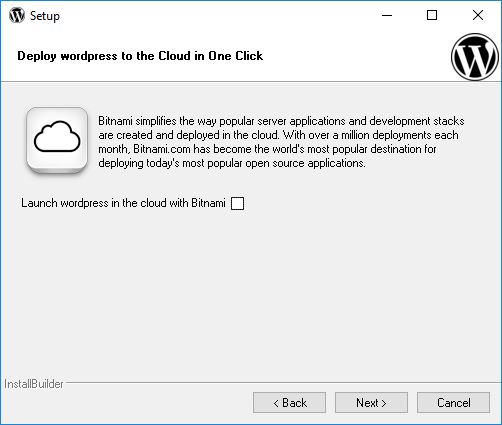
Deploy WordPress to the client option is selected by default. I unchecked this option as I don’t have a plan to use it for now.
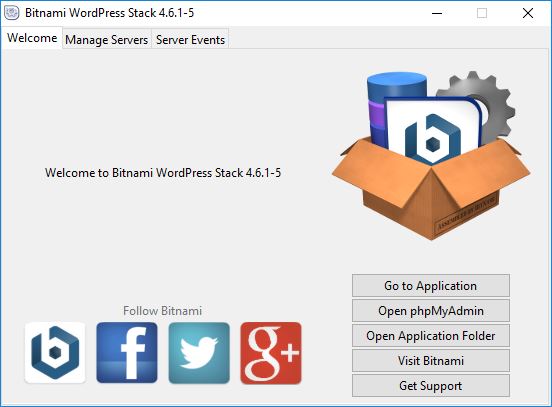
Once installed, ‘Bitnami WordPress Stack Manage Tool’ is installed, that looks like as below. This tool is easy to access the app (WordPress) and start/stop PHP/MySQL. This is very convenient as you may need to change configuration of PHP and access to MySql as you play with Word Press in the future.
Now WordPress installation is completed. Browse to localhost:82 or 127.0.0.1:82. You can see that Word Press is installed.
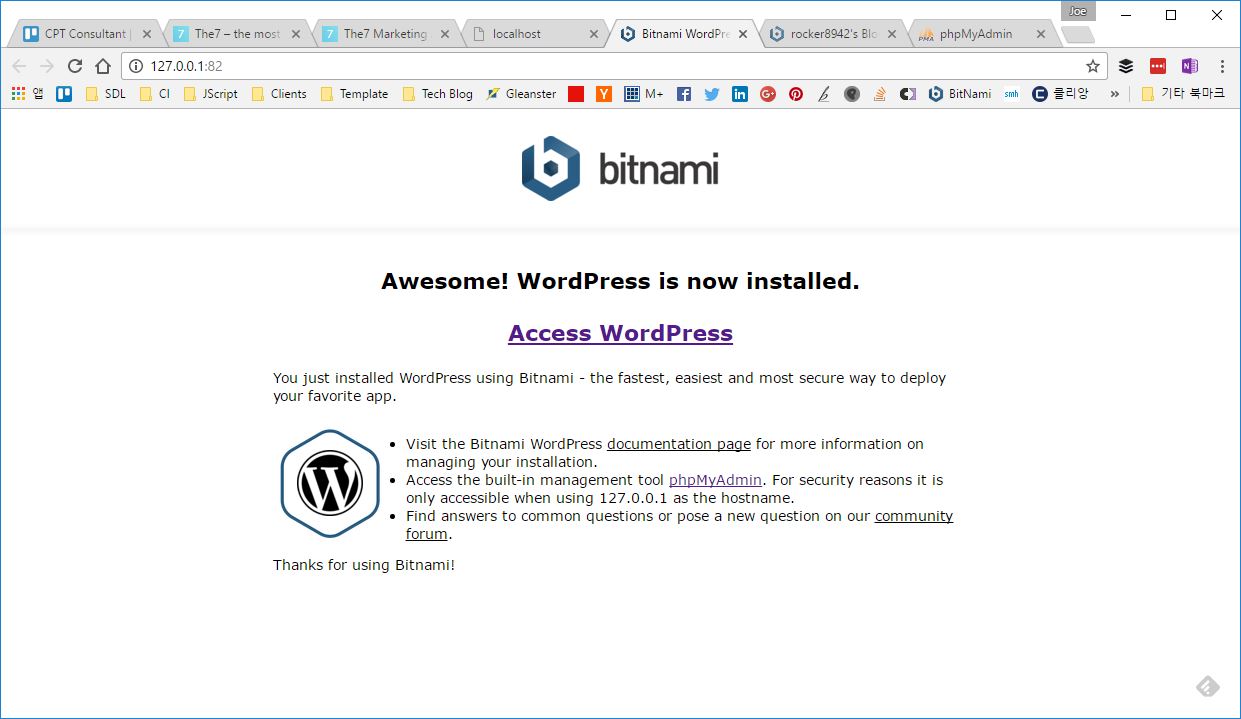
We can see that WordPress is installed at http://127.0.0.1:82/wordpress
As the WordPress is not installed at root URL, but installed in “/wordpress”, a configuration is required, if your WordPress in server is running in root URL.
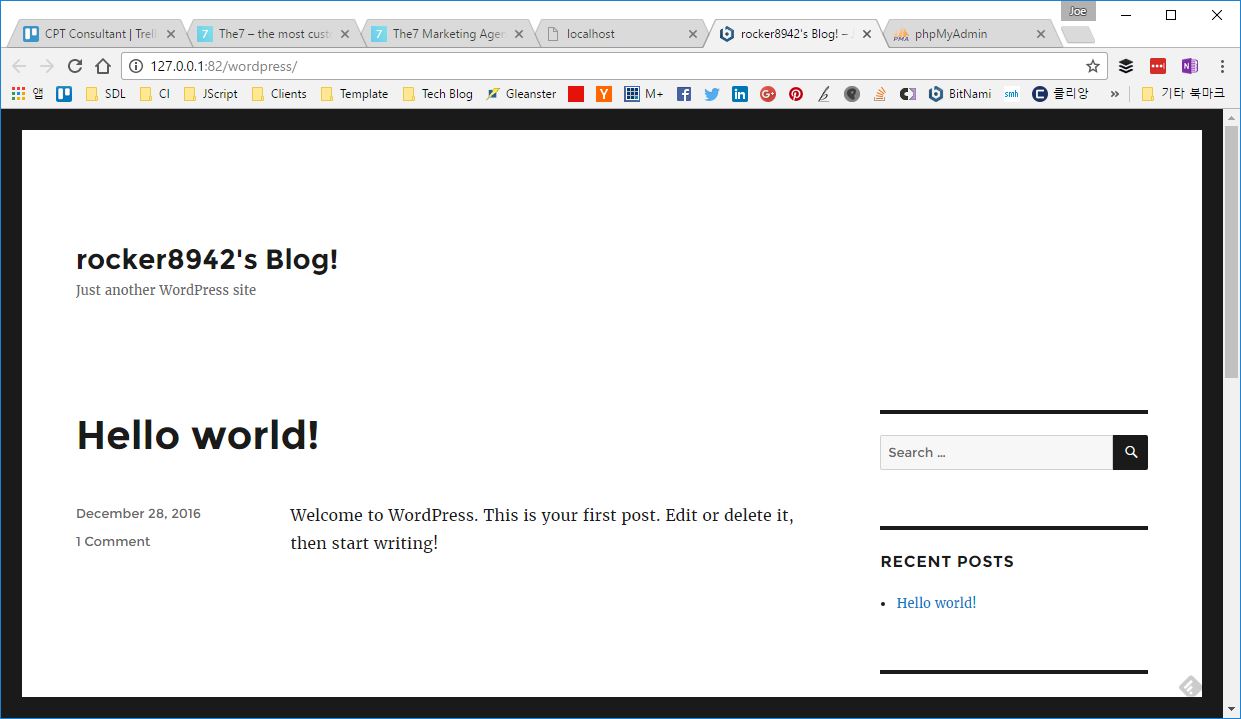
If you browse to http://127.0.0.1:82/wordpress/wp-admin, you can access to admin page by login using the id and password you chose when installing the WordPress bitnami installer.

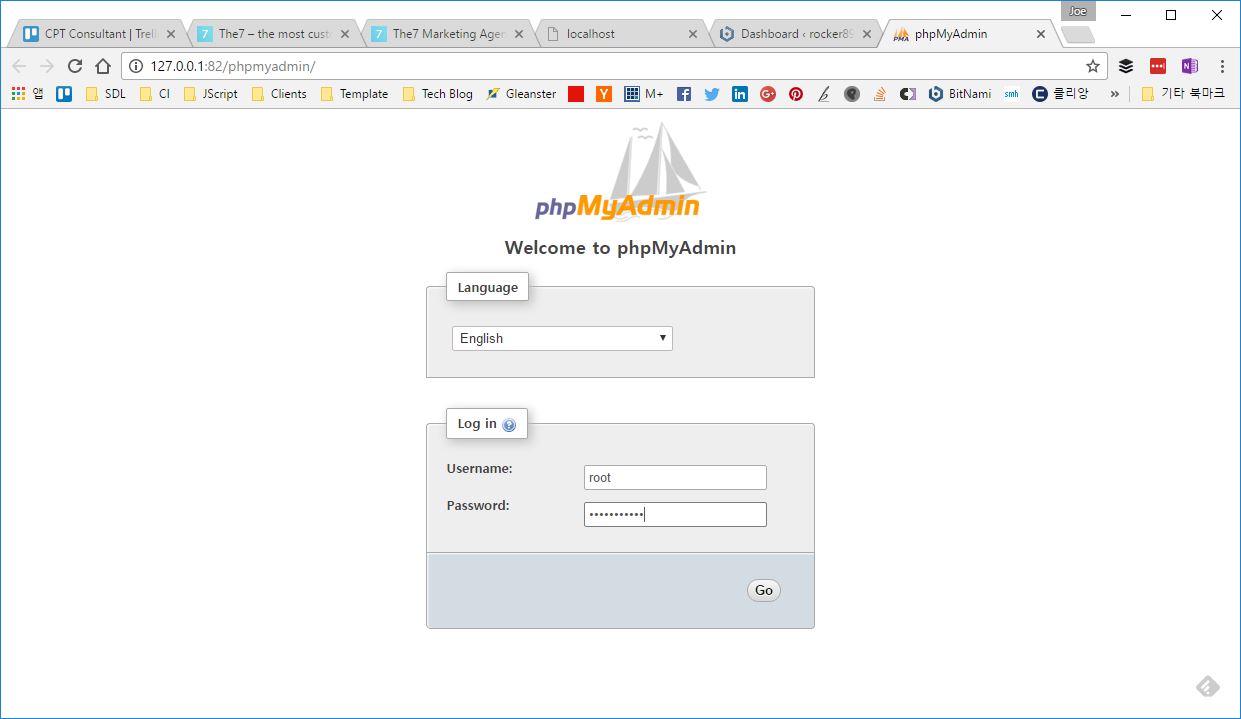
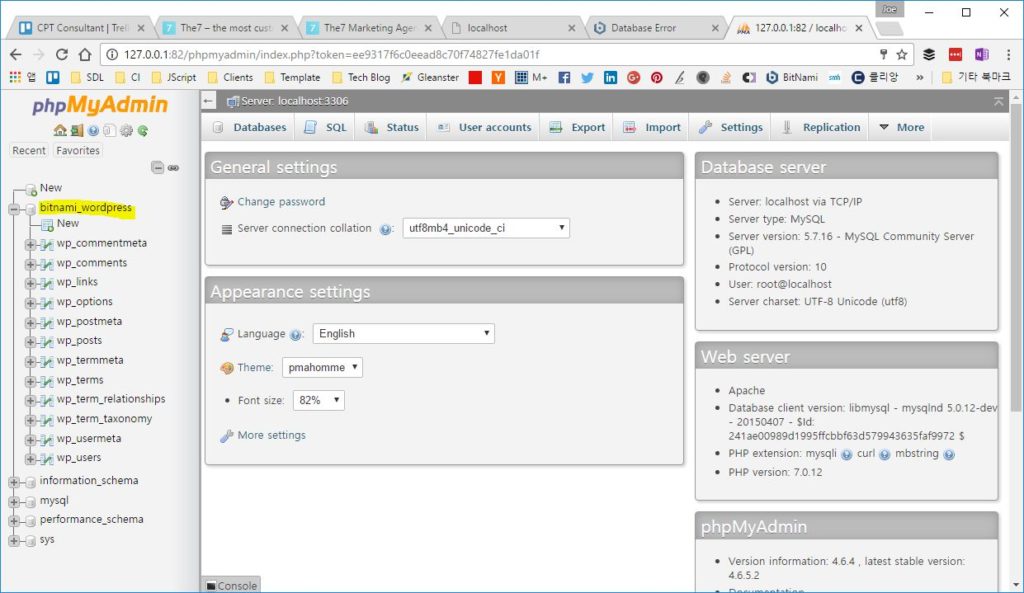
You can see phpMyAdmin is installed in http://127.0.0.1:82/phpmyadmin. This will be used to migrate WordPress DB.
Check the database name shown below to use later.
Part 2. Migration.
1. Copy files of Word Press from the server to PC.
This can be done by copying all files using FTP, which is easy but take long time. Or you can zip up the files and unzip it later in PC after FTP the zipped file. But, to do this you need a SSH access that’s normally not provided by default due to security reason. Still, you can set up SSH connection so that login in the server using Telnet and compress the files.
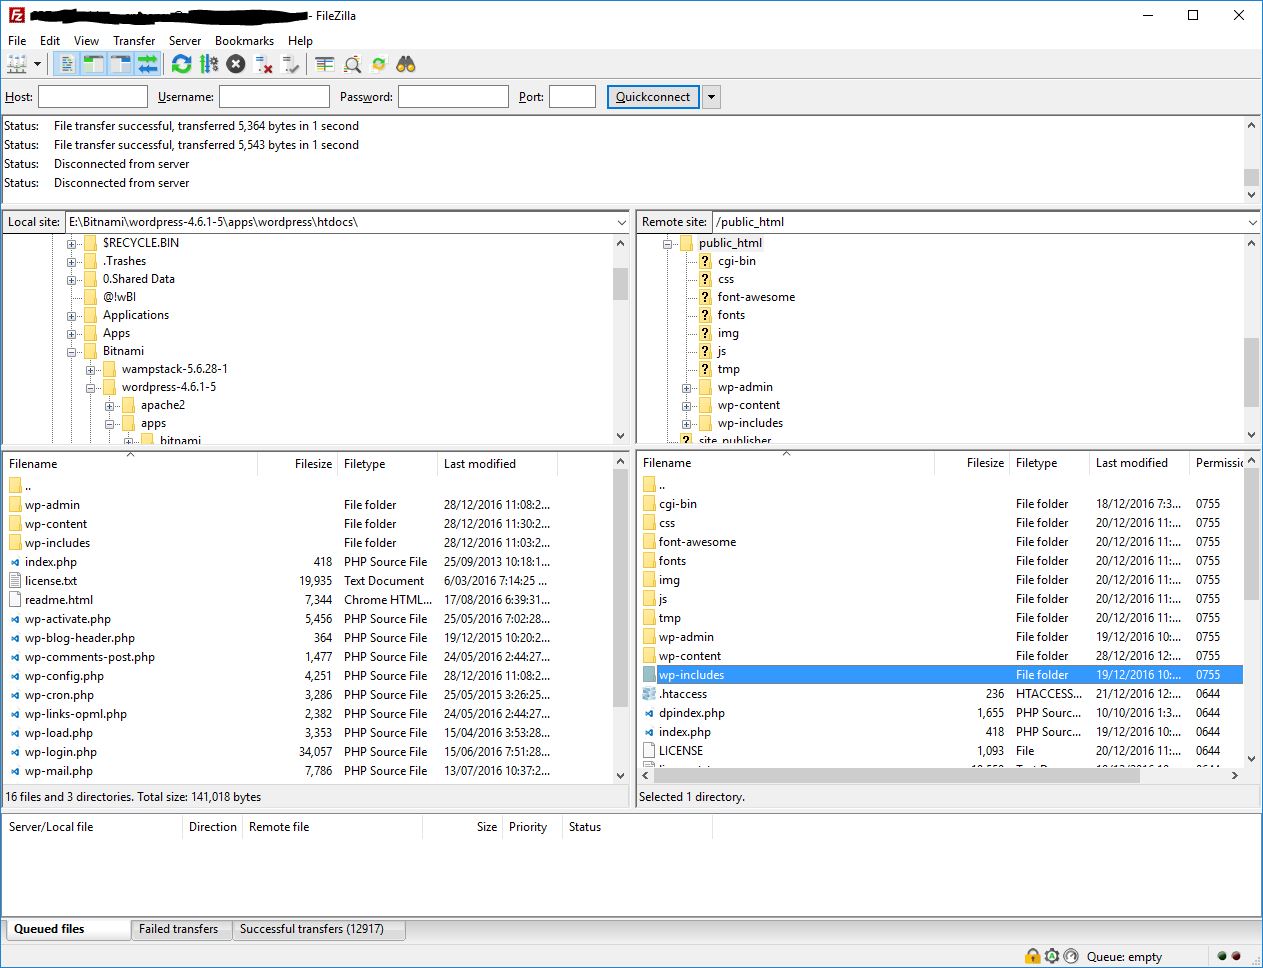
Word Press in PC is installed at C:\Bitnami\wordpress-4.6.1-5\apps\wordpress\htdocs. You just need to replace all files in there with what’s in the server.
Once files are replaced with ones from the server. Word Press in PC cannot connect to the database.

We need to change a few configuration to tweak the difference between the server and PC.
Modify wp-config.php in PC to change DB name and access credential as below.
/** The name of the database for WordPress */
define('DB_NAME', 'bitnami_wordpress');

/** MySQL database username */
define('DB_USER', 'root');

/** MySQL database password */
define('DB_PASSWORD', 'YourPassword');
As the URL of the Word Press in the PC includes ‘/wordpress’, we need to change the same in wp-config.php.
define('WP_SITEURL', 'http://' . $_SERVER['HTTP_HOST'] . '/wordpress'); define('WP_HOME', 'http://' . $_SERVER['HTTP_HOST'] . '/wordpress');
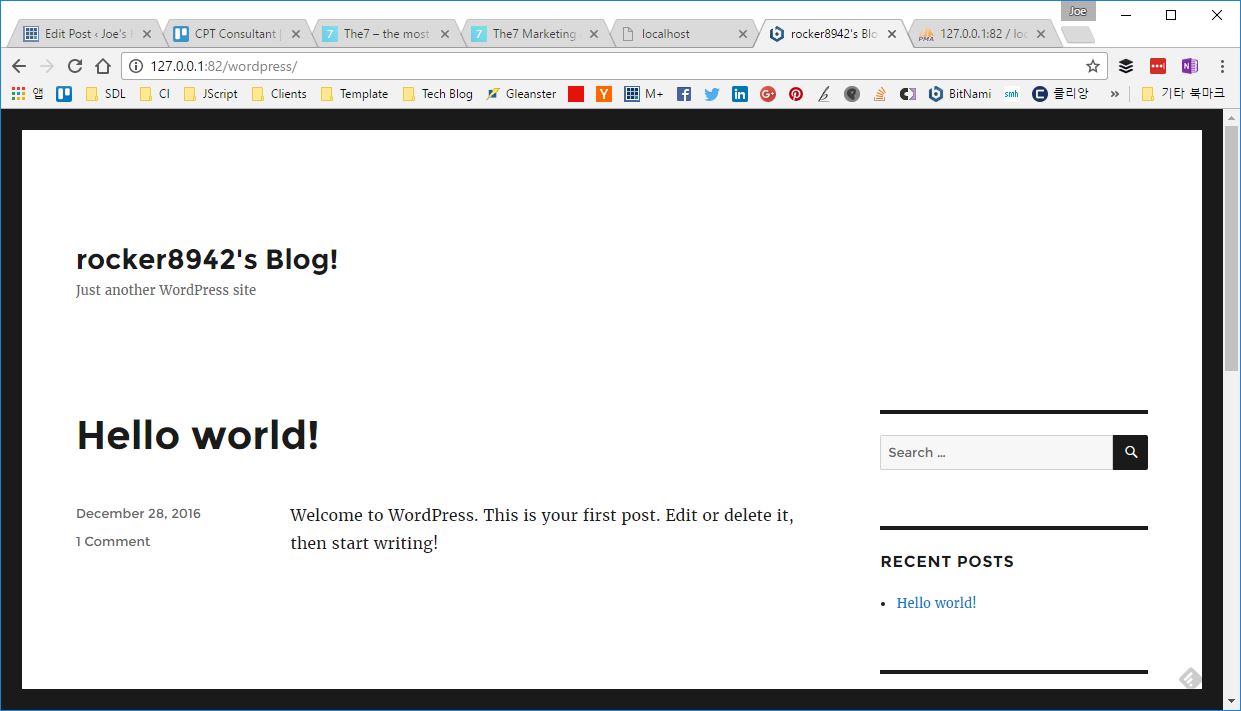
With this change, Word Press in PC should work again as below.
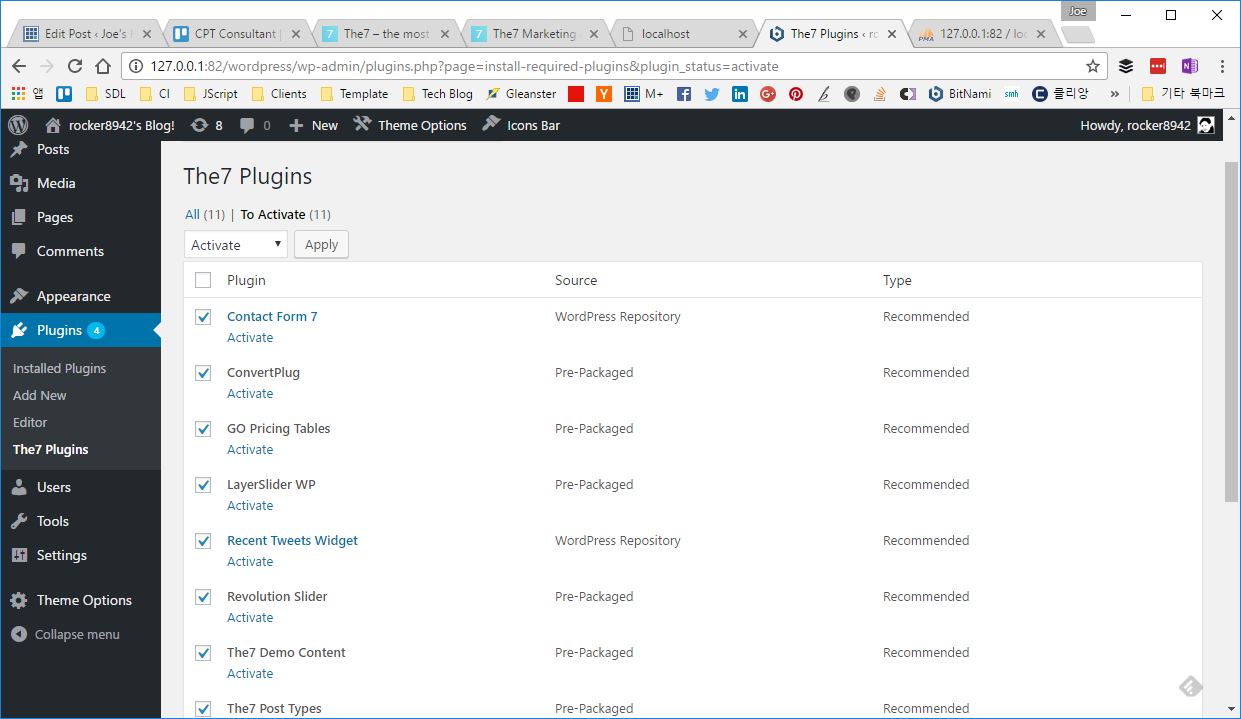
Now, it’s time to change theme to the same one that’s being used in the server. As we copied the whole files, we the theme to select should be listed in Appearance > Themes menu in admin page. Choose the theme to use and click Activate.
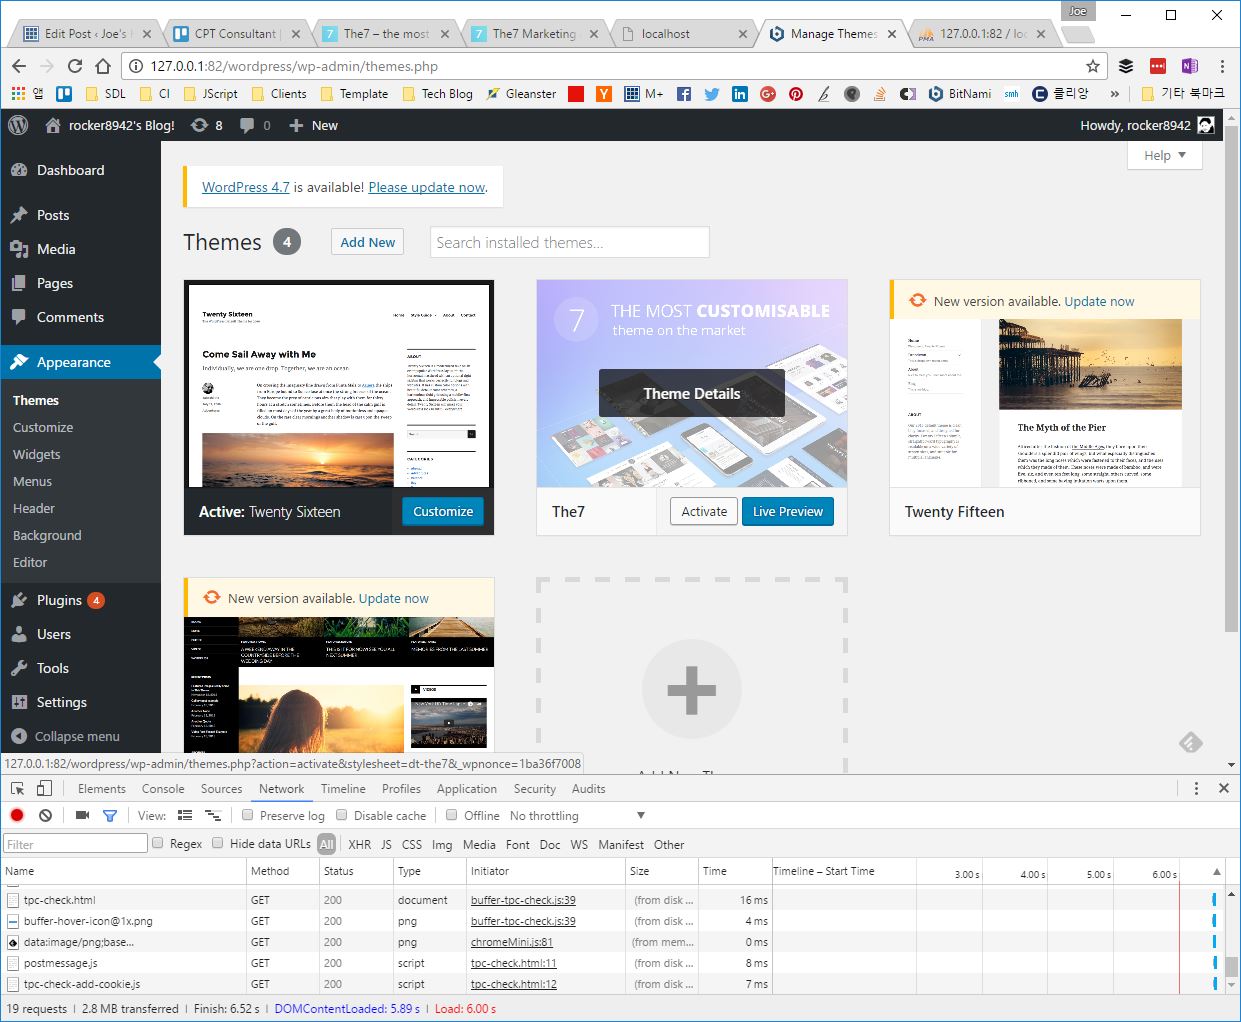
If there is any recommend plugins that’s already provided with the theme, install and activate those as well in Plugins menu.
2. Migrate database
Export whole database from the server using phpMyAdmin and import it into Word Press in PC.
Goto phpMyAdmin in server and select the word press database, then go to Export menu. Just click Go button with all option as default.
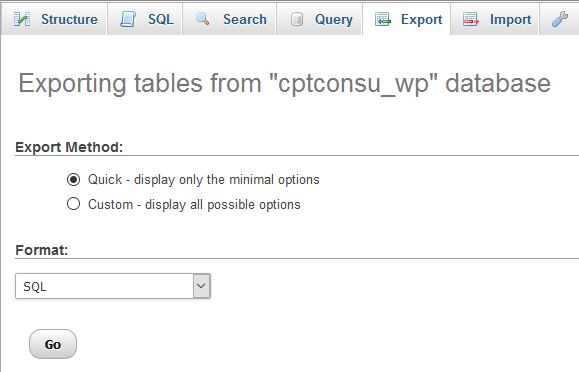
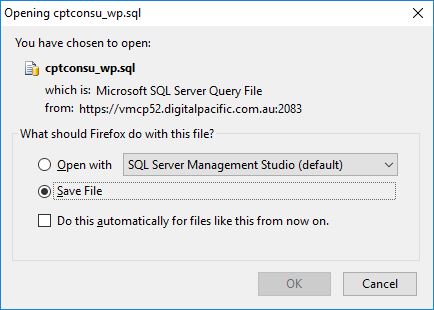
Save the export database in local machine.
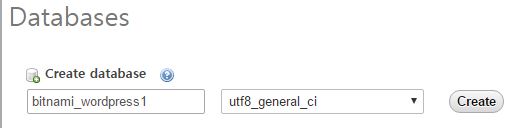
To import the database, let’s create new database in PC with new name.
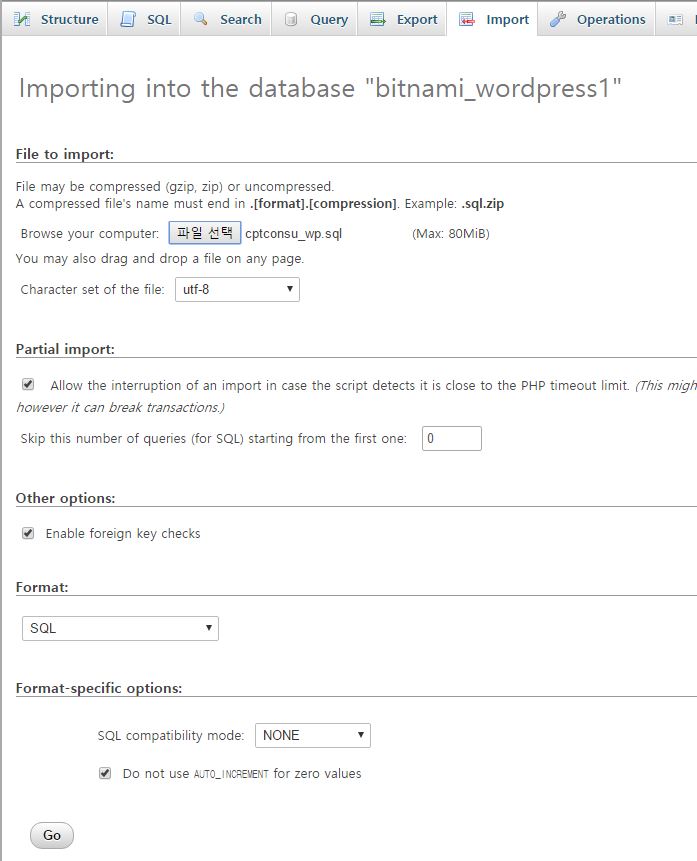
Select the newly created database and let’s Import with all default option. It’s so easy.
Once database import is completed, change the database name in wp-config.php file again to be the one that’s newly created.
define('DB_NAME', 'bitnami_wordpress1');
You should now see fully migrated Word Press site in your PC.
